How to paint brown skin
– The Old Lady of Bali –
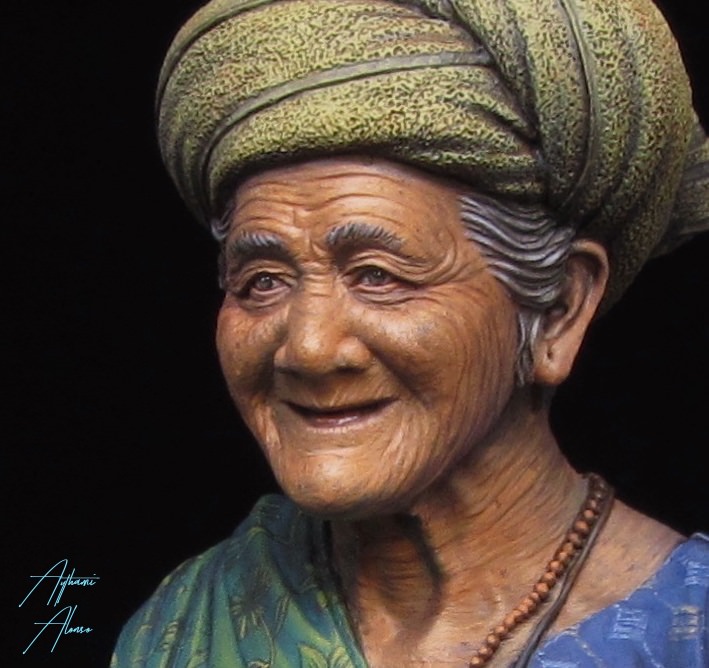
Bust from Robot Rocket Miniatures. (buy here)
Sculpted by: Brice Savina
Painted by: Aythami Alonso
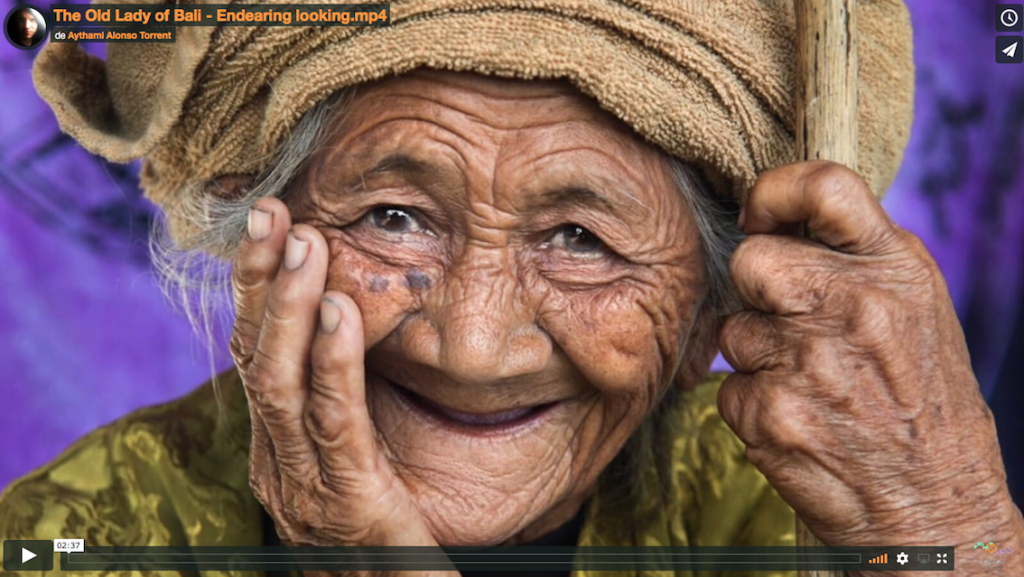
The first thing is to be inspired by original photos of hindu elders.
This is one of the best ways to motivate and generate ideas for a project.
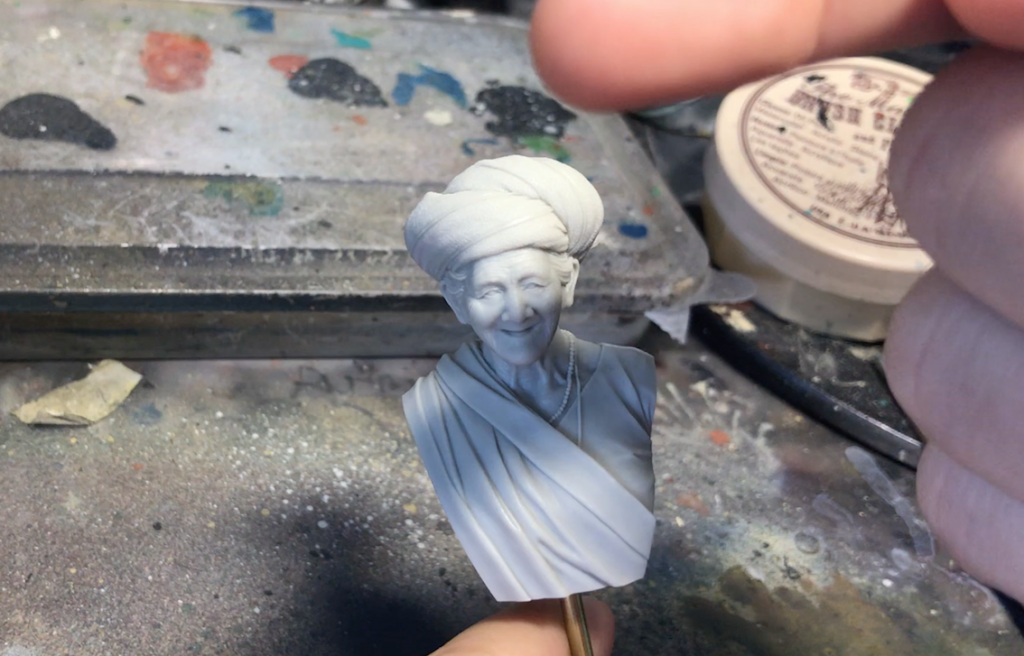
Before I start I take the figure and go spinning it under one or two sources of light to study the rebounds and features.
For the old woman we wanted a natural and simple atmosphere representing her personality, so I discarded the idea of playing with several sources of light (2D effect). We decided that it would be affected by the sun, cenital light coming from the right. And another subtle light of the blue sky on her back. Something very different from what I’m used to paint lately. This tought me that each project asks for something new and you have to adapt.
- Tip: There are several sources of light that affect us daily. The most common are the sun, the blue sky, the cloudy sky, artificial sources such as light bulbs and the rebounds of them on objects such as trees, walls, cars, people, etc. Go outside and observe the nature. Ask yourself if your bust is in an open and sunny day or in a cloudy sky. You will see that the colors and lights vary considerably. For example, on a cloudy day the colors are much more faithful but nevertheless, look towards the ground, there are no projected shadows.
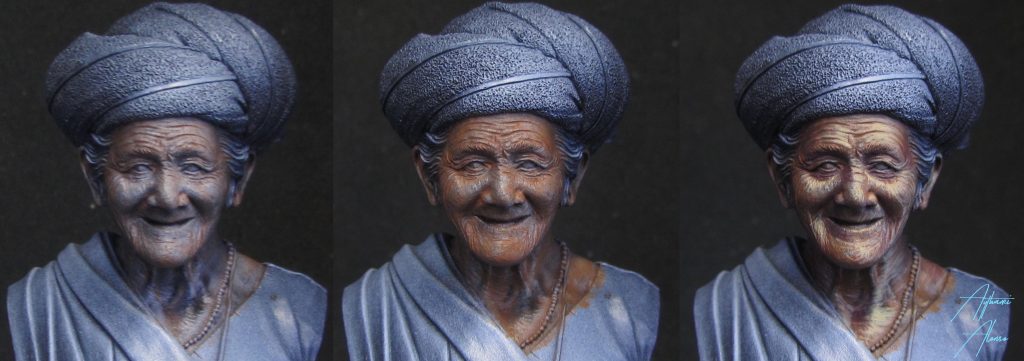
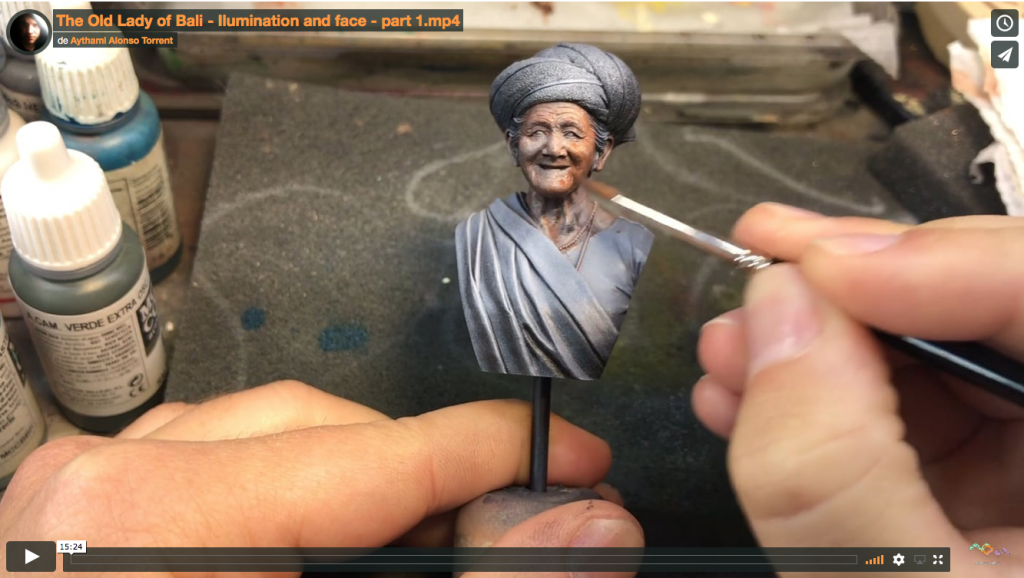
We start with a Red Leather wash (Vallejo), with other brown/red tones until we approach what we are looking for.
Sketch highlights with Sunny Skintone (Vallejo) with a thick dilution. We paint the features that we have previously studied with the photos and the observation exercise. It is important to look for references and copy if we do not know the angles they form.
While we sketch we manage to shape the factions much easier than if for example, we glaze. It also gives the sensation of freedom in each stroke cause you aren’t worried about dilutions, motivates us because we see quick results and we are creating a mental map that will help us later.
At the beginning it could be scary to painting like this but you will see what makes the work faster.
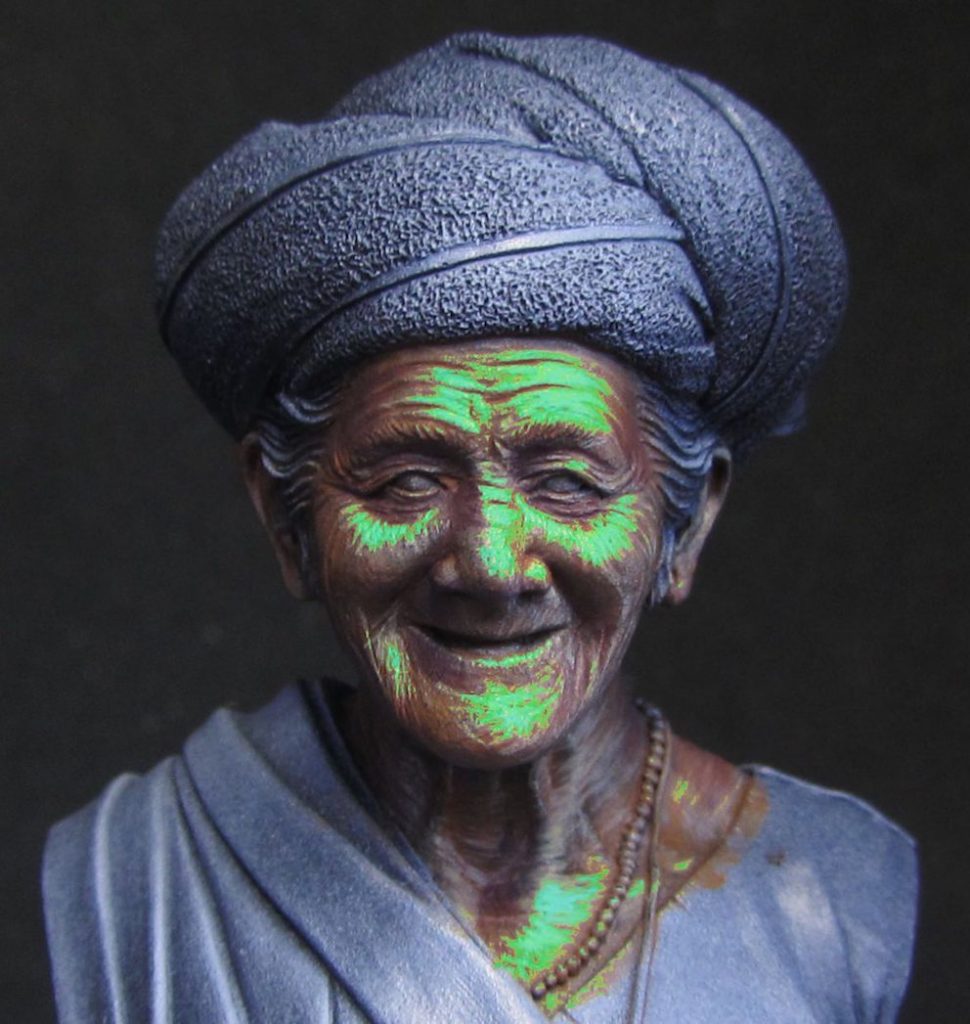
Why have we put on her this rejuvenating cucumber potingue?
So that it’s easier for you to assimilate the precise brushstrokes, position and the shapes of the first highlights. You have to understand it very well and study them.
The two main factors to consider are:
– The position of the lights with respect to their source and bounce angle:
Observe how the light enters from above and to the right, affecting more to the right cheek, the forehead area and the nose from its side. This is easy to observe, but the interesting light bounce that could be unnoticed is the one on left corner of the mouth, because the smile creates this particular angle.
– The precise shape of each light
If it is a wrinkle, a circumference or another shape. But how does that wrinkle begin and end? In a straight tip, in a half moon? Is there a point texture in some areas like the tip of the nose creating circles?
All these factors must be raised and studied in books and anatomy photos.
This book that Peter Carr recommended me is fantastic: Light and Color, by James Gurney.
Then we will see an example of how a feature changes making it with the correct shape.
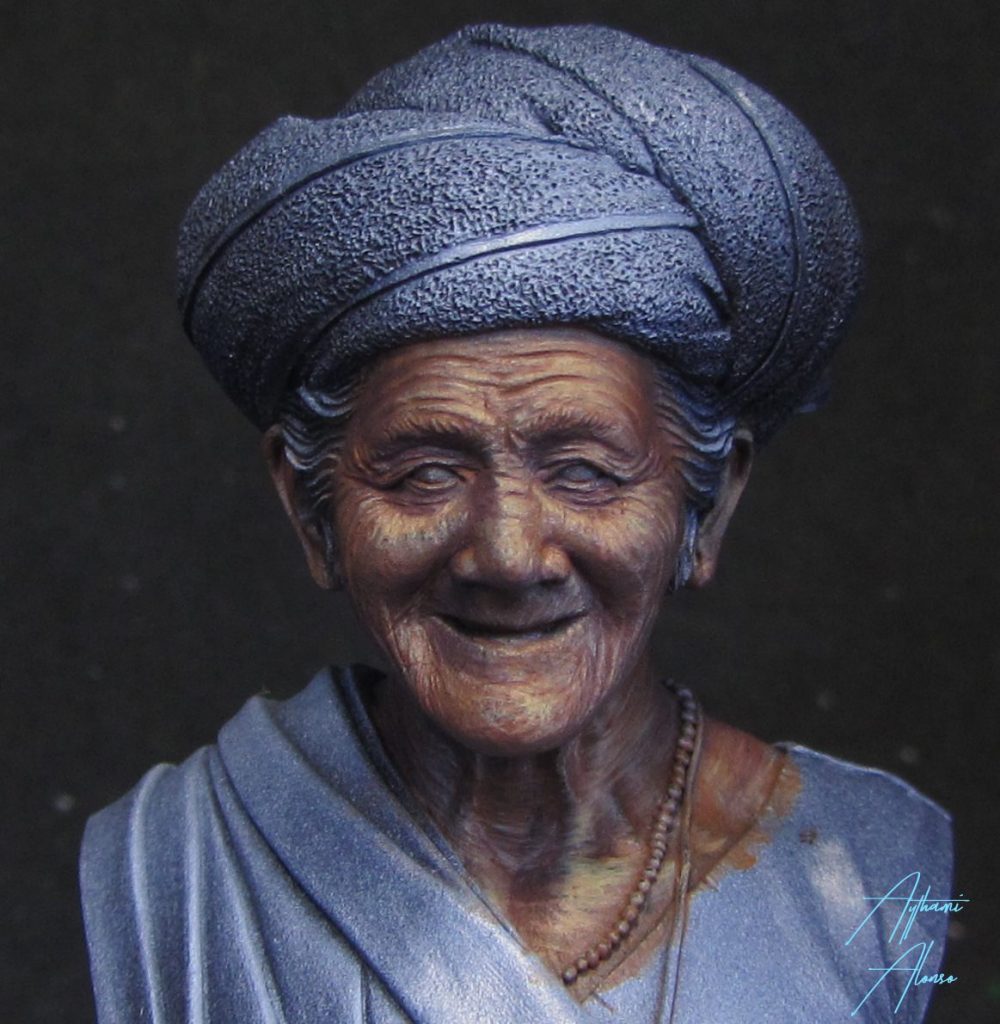
Once sketched I like to unify to see if we are on the right track. We take the same tone of the base and apply it all over the face like a wash. We will see that little by little the lights are being unified. The more layers, the more unification. An important factor is that depending on the color below it will be saturated once the light is unified and becomes transparent.
– Tip: When you paint a red cloth try to sketch with white before painting with red on top and you will see what I mean.
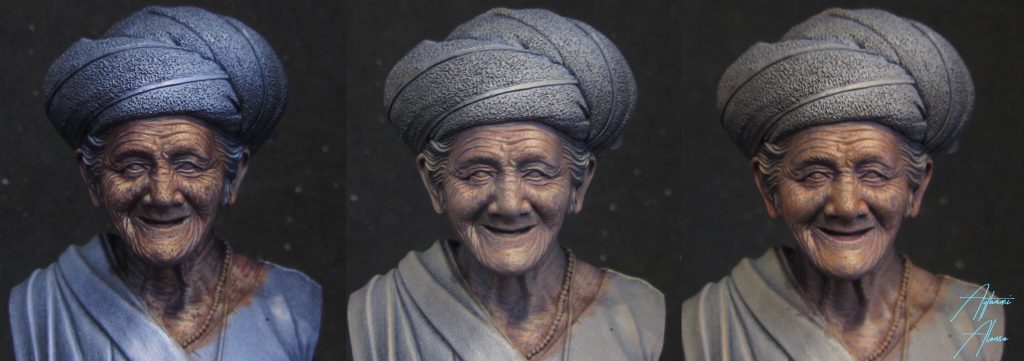
The next step is the shadows. We take the base tone and mix it with blacks and browns. With a thick dilution we sketch shadows and spots as we did with the lights. With this spots and stains we add an old looking to the face.
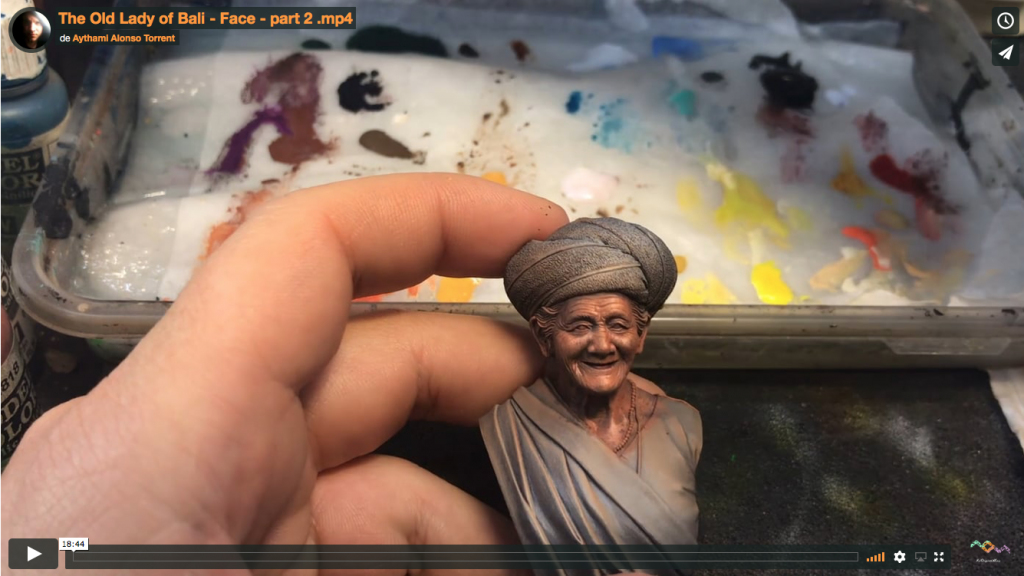
In the second photo we have unified but this time by airbrush. We throw paint with a lot of dilution with the base of color plus a little of the tone of light, Sunny skintone (Vallejo) and we give soft strokes waiting for them to dry between them.
But the result is pretty little saturated. We need color, so we continue with the airbrush but this time with Clear Orange (Vallejo). Here we have to be careful because the oranges/reds stains a lot and we do not want to hide too much of our previous work.
– Tip: You will have noticed that I don’t name the colors I use too much. I think it’s more important to know how to deal with color problems while you paint than copying other people’s recipes. Here we have an example. How do I turn on the color of the second photo? Orange washes. I would never have learned this if I had copied the magic recipe of other painter.
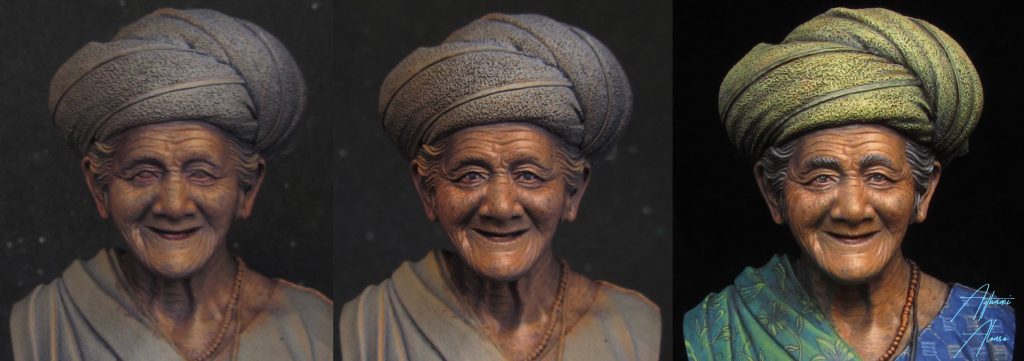
Always, when we unify we have to get back the lights and shadows but this time with glazes. The sketching has fulfilled its function to speed the steps. If you notice we have achieved an advanced work of lighting with only one tone of highlight and one of shadows helping us with the unifications. Here lies the power of sketching and unification.
As I said, theres a lack of illumination work after unifying. The face is flat. We get highlights again but this time on a smaller area than before, glazing and with Sunny Skintone (Vallejo) and Ivory (Vallejo) (2nd photo). Then we take the same Clear Orange (Vallejo) of the unification and, by brush and washing we place strokes over the lights, we are enhancing its color, how we explained at the beginning. The white/yelowish tone absorbs the color that’s above and we gain in saturation. With the same technique, we apply tones on the cheeks and sides of the face, enhancing the medium shadow tone towards the orange. Is important to add tones to all faces.
– Tip: Do you remember that I was going to show you how a well-placed feature changed the looking of the face? Look at the first photo and the second. Do you see something different? I have placed the hightlight towards the center of both cheeks, making a larger circle in the right cheek. Silly details that makes the difference.
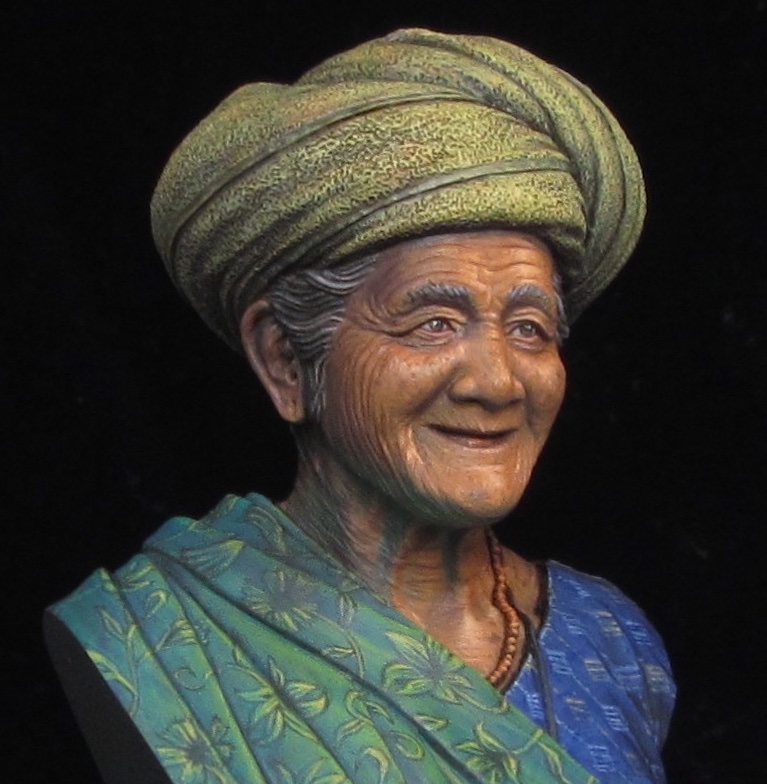
One last detail. Look at the subtle green shadow below the jaw and neck. This is cause of the reflection of the bouncing light of the green fabric.
Videos of all the process
Here you have a little introduction (free) of the Video-tutorial and inspiration for the project.
- How to paint brown skin
Divided in two videos, I explain how to face with color problems without having to copy other painters palettes. We will see the importance of the position and shapes of the illumination. We will talk about contrast and color/light bounces depending on the texture.
 To view the video, login or subscribe
 To view the video, login or subscribe
- How to paint and endearing looking
 To view the video, login or subscribe
- How to create realistic wrinkles on fabrics
To view the video, login or subscribe
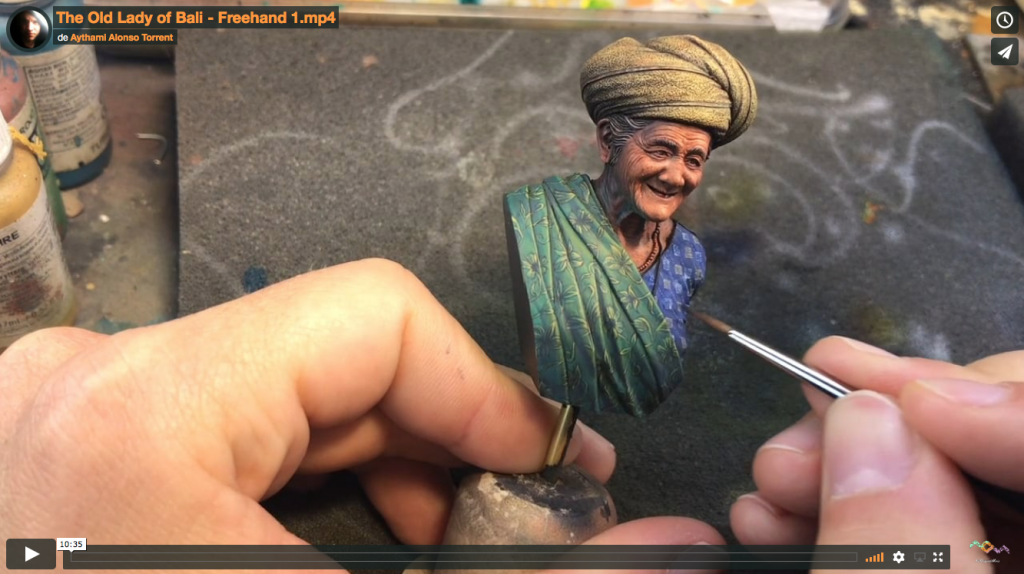
- How to paint a freehand
 To view the video, login or subscribe
I hope you find it useful
Best regards,
Aythami Alonso
www.notoriginalminis.com
A most interesting article.I am so impressed by the shades and would never have thought of painting the face as you have.The face reminds me of the bust of an old North American Indian called ‘Rainy Mountain Charlie’.Thank you for
the article ans I look foreward to seeing more of your work.
Kindest regards.
Bill Burke.
Thanks for your words Bill¡
There are so many ways to paint that we can always learn something new. I’ve checked out the North American Indian and they are very similar. If you are painting it send me some pictures to see your work 😉
Stay tuned for the painting videos that will be uploaded this week. Hope they are useful too.
Best regards,
Aythami Alonso
Hi Alonso,
Very nice to learn about your vision on painting.
So yes, most useful! 🙂
Kind regards
Roel
Thanks a lot for your words!